Best Way to Apply Thermal Paste
Thermal paste (also known as CPU grease, thermal compound, or heat paste) is a viscous substance usually applied to a computer’s heat sink to improve heat transfer.
The substance’s main function is to fill the space between two devices, preventing insulating air gaps from forming. This approach helps to dissipate heat from the device.
You might also use the thermal paste to ‘drain’ waste heat generated by semiconductor devices like GPUs, LED COBs, and power transistors.
Applying thermal paste correctly is crucial for the most efficient heat transfer and dissipation. This guide will help you achieve a strong steal for optimal cooling.
Common problems with thermal paste application
Thermal paste presents several changes thanks to its dense consistency. Unlike thermal adhesive, it doesn’t mechanically strengthen the bond between the heat sink and heat source—it relies on pressure from external fixation mechanisms like screws.
‘Pump-out’ is another common problem. When the CPU die and heat sink experience different thermal expansion and contraction rates, the paste between them is ‘pumped’ out, reducing performance over time.
You can avoid many of these issues by following our tips on how to apply thermal paste correctly.
Applying thermal paste the right way
Our top tip for applying thermal paste the right way is to prepare!
Before you begin, make sure:
- The device doesn’t already have thermal paste applied. Many CPU coolers will come with pre-applied heat gel, which you can check by looking at the bottom of the cooler’s base plate.
- The device is clean and free from residue. You can use a microfibre cloth and isopropyl alcohol to remove old paste build-up, but make sure to let the surface dry before moving on.
- The rest of the cooler is ready to go—follow the device’s instructions if unsure.
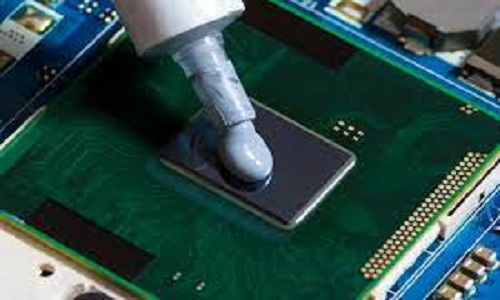
Now it’s time to apply the paste. Ensure you’re using the right amount—about the size of two rice grains—and avoid spreading the paste yourself. The pressure of installation should be enough to spread the paste evenly.
To apply the gel correctly:
- Read all instructions before you begin (for all devices involved and the paste).
- Squeeze a pea-sized amount of paste onto the center of the CPU.
- Install the cooler using gentle, top-down pressure. Apply for the base plate as straight-on as possible to ensure an even paste spread.
- Keep the cooler in place as you attach it to the mounting mechanism and motherboard. Make sure not to fully tighten any screws until you have attached all of them.
- Double-check to ensure everything is secure and free from thermal paste spillage. If there’s any leakage, use isopropyl alcohol to clean the paste and start again.
You’ll know the application went well if the clean surface and the cooler stays put when you touch it.
Improve performance with thermal paste
In summary, thermal paste improves heat transfer from one electronic component to another by filling air gaps between the two surfaces. When applied correctly, the gel can significantly improve cooling efficiency and increase your device’s performance.


